Thursday

Bar


Here is the bar that sits in the corner of the casino, this is where the camera is going to pass in the animation, it has the martini bottles and cocktail glasses on as well as the golden gun. I decided to change the textures on the martini bottles because the decals that I applied didn't fit with the other design in the room. I also applied a bamboo texture to the bar which adds to the effect of the bar area. The texture on the glasses was made by changing the diffuse colour to white, setting a high specular and glossiness level and adding a falloff to the texture. This creates a nice glass look but could be improved as it is a bit too transparent.

Creating Poker Table and Stool

Here is the poker table and stool that feature in my casino. These are the main make up of my casino and will feature in the animation.

The stool was created using a technique that I had previously used, Lathe, this technique is really quick for creating objects that are based round a pivot. I also added a black matte material to the stool to try and get a leather effect but I do not know how affective it will be once in the casino but it should give it some texture.

The poker table was my favourite object to make because it came together and started to look good when I added the textures to the legs and added the felt material to the surface. The legs were simple to create, I just made cylinders and cloned them; then added a wooden texture to give make them look realistic. The table top was created by using the square tool and I line it up with the legs to get the correct size. To round the edges I used the modification tool 'chamfer' this allowed me to play with the roundness on the edges of the square. I had to select the corner face to do this and the effect was very pleasing. To get depth with the poker table I cloned the table top and resized it with the resize tool, I shrunk it till there was a nice sized boarder that I could cut out with the boolean technique. So I went on to cut the inside from the table top to create the raised edges. I also used the boolean to cut the circle indent by the stool, I just used a standard sphere to cut the circle from the table. I applied a felt texture to the table top but came across a problem, it was applying the texture to the whole table top rather than just the very table surface. So I applied the standard glossy black to the raised part of the table and it covered the table so I had to make the top an editable poly meaning I could manually select the faces of the shape at the top of the table to apply the material to which finally worked. So now I have my poker table and stool as well as the stairs into my casino. Next will be making the structure of the room with the walls and the floor.

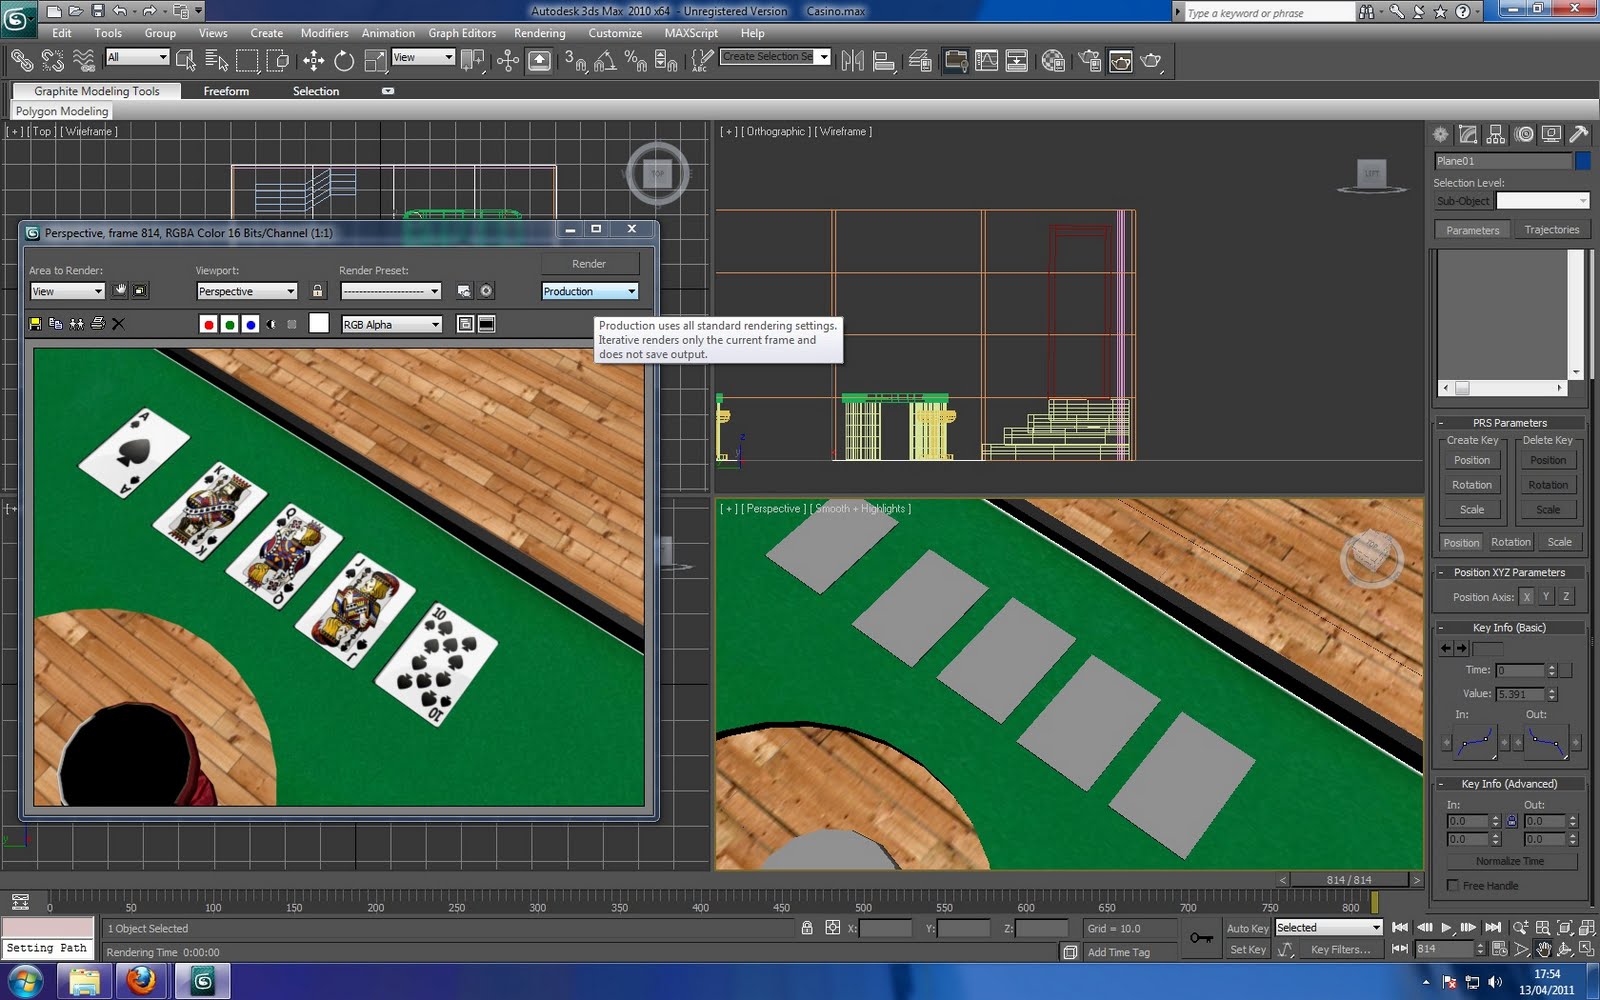
Cards on the table.


The next step of building my casino environment was adding cards to the table. I created cards as one of my three models and I imported them into the scene. I laid the cards out and they added to the look of the poker table which will be featured in my animation. I grouped the cards together so that they were easier to manage when I am animating in the casino.

Tutorial 7 - Propeller


This is the propeller that we created in week 7, we learnt about using the set key and the auto key with manipulating the propeller and also what adjustments can be made to the propeller to give it a more realistic look. So first of all the set key was explained, this allows you to manipulate objects on the screen by setting the first frame with the object in one state and the last frame with the object set differently, 3ds max will then tween the objects that have been moved between the frames. As you can see in the video this has been used, the first frame was setup so the propeller had not been spun but on the state changes throughout ending with the propeller having spun many times. This is good for people animating helicopters or fan propelled objects. The auto key does a similar job the the set key but does the key setting for you, for example if I moved the timeline up 20 frames and then manipulated the object it would automatically tween the object rather than me selecting to add a frame in.

To create the propeller I had to first make the four rectangles which were going to spin and attach these to a centre spinning piece, the circle. Once these four objects were attached I then pressed set key and added the first frame in, then dragged the timeline to the 100th frame and span the propeller many times. You will see in the video that a motion blur has been applied this gives it a more realistic presence, I added the motion blur by right clicking on the object, object properties, motion blur. You can the adjust the properties to have different effects. Also you will see in the video the propeller changes colour, this was done with the auto key and dragging the timeline on four frames I changed the colour.

Wednesday

Update

This is an update to just explain the process that I am at.


This is going to be the stair case which is the entrance into the casino, I am yet to post the plans for my animation but it is going to be set in a casino. As you can tell from the image it looks like a staircase and I am using Boolean to make sure it fits tight with the wall. The first thing I had to figure out was completing the Boolean on more than one object, I tried to make the staircase from one primitive shape but extruding the segments out was not working correctly so I had to use individual shapes and use proboolean to merge the objects so they became one. This was done by selecting merge on the parameters and selecting the objects that I needed. Once all the cylinders were attached I could then use the boolean to square off the sides of the staircase to fit against the wall in my casino. The casino so far consists of 3 poker tables the stair case and the walls with wallpaper as you can see below. The next step is explaining how I created my further objects and how I am going to animate.

Introduction to animation


This is my first attempt at animating objects in 3Ds Max, I am going to be using the Auto key technique for this animation. Auto Key animation allows the user the simplicity of changing the shapes and the time on the time line with the computer adding the key frames in. First I started by making a cylinder in the front viewport, then I bent the object to one side and dragged the frame slider to a new frame. This added a key frame into the animation and this acts as a key to what the object will look like by that frame, I then rotated the object and added a new key frame in later in the time line.

Above is the rendered copy of the animation.

To render the animation out to view in a video file you have to change some of the render settings. You have to change the 'time output' to 'active time segment' or 'range', if you select range you have to specify which frames you want to render. Once you have that selected you can select what size you want the video frame size to be. Then finally you have to select a file destination for the video to be saved to.

Friday

StoryBoard

Today I handed my 3 Models in and I am going to develop the ideas that I have had for the animation by making a storyboard. This storyboard will include the models that I have created and maybe some more that I intend to make for the final animation. The main point I am going to portray in the storyboard is a bullet being shot and smashing the Martini bottle, the scene will be placed on a poker table which will be another model I will create. The difficulty with this animation will be getting the bottle smash to look realistic, in the storyboard I will try to show the scene as it will play out.