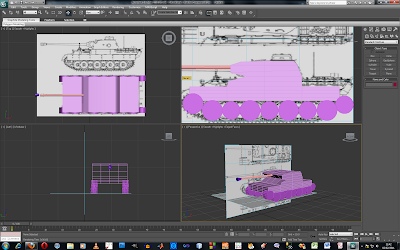
 This is the tank that I created in the tutorial, the first thing we done before we started putting any shapes in the frame was to make our reference plates. Reference plates are images with a simple line drawing of what you want to create, as you can see in the image I have some for the side aspect and the top aspect of the tank. These are very useful if you can get hold of them because it makes modelling to proportion a lot easier. So to bring the reference plates in you first have to make a 'plane' the size of the image so it fits correctly in size, once the plane is the right size you make a material by pressing 'm' to bring the material window up, you can then import the bitmap by navigating the material window by going to 'diffuse' and select bitmap. Once you have the image on the plane you can change the angle which may be necessary if the image is not fitting properly, the options to change how the material lays are in the material window.
With the reference plates in place you can start adding the objects into the frame, I started by adding the wheels and building up the body of the tank with different squares and rectangles. I found out that by adding more shapes it was vastly increasing the file size, so I then created rectangle the size of the base and extruded the shape to fit with the reference plates, it is quite tricky getting used to extruding a shape because it never seems to go the way you want it to. I find that I see how I want it in my head but actually putting it into practice seems to be quite tricky, this will develop I am sure over time as I get use to extruding shapes.
You need to describe in detail how you produced the reference plates - as a aide-memoir for yourself later in your degree. Reading this account tells me very little.
ReplyDelete